How We Find & Fix Broken Internal Links
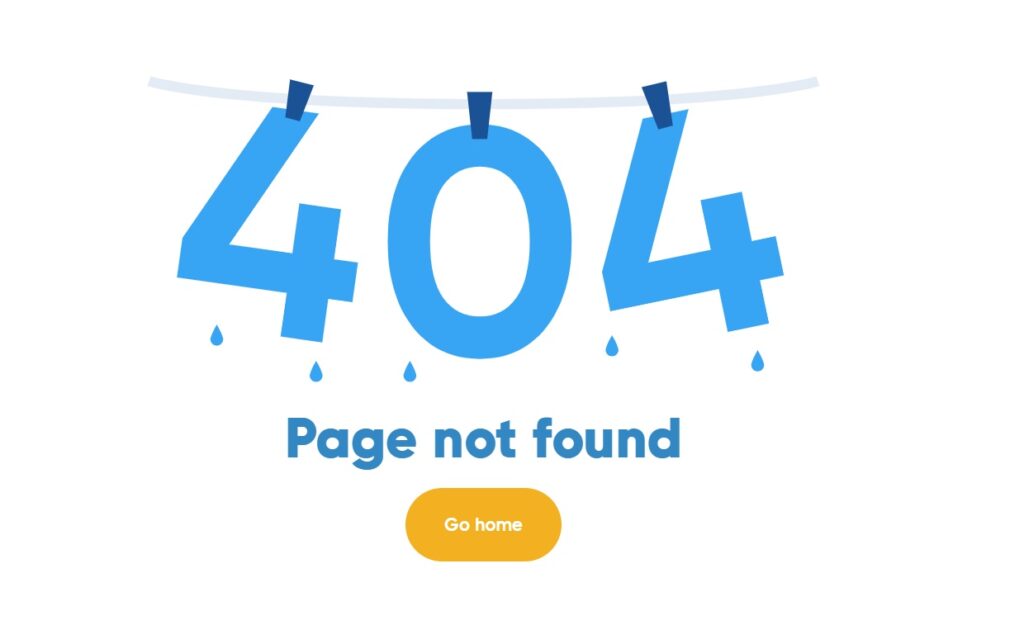
Broken links are a nightmare. You know the ones – the frustrating “404 Page Not Found” that pops up out of nowhere. They’re sneaky, and you might not even realise you have them.
Trust me, they’re causing damage. They’re hurting your site’s user experience and sabotaging your SEO. And the worst part? You probably don’t even know where they’re hiding.
So, let’s fix that. We’ll show you how we find these invisible villains at scale and get our clients’ websites back on track.
Before we get down into the actual steps, let’s look at what broken links really and why you should care.
What Are Broken Links?
Broken links are links on your website that no longer work. They could lead to a page that’s been deleted, moved, or never existed in the first place. When a user clicks on one, they’re greeted with an error, usually a “404 Page Not Found” message.
Now, imagine you’ve got a few of these scattered across your site. Every time someone clicks on a broken link, it creates a dead end, frustrating them and wasting their time.
And search engines? They don’t like broken links either. Google sees them as a sign that your site isn’t well-maintained, which can hurt your rankings.
Let’s say you have a blog post linking to a product page that’s been deleted. Visitors to that blog post click the link expecting to buy something. But, boom – they hit a 404. Not ideal.
Below is a real-life example of a plumbing website with a broken link to a decent article.
Causes of Broken Links
Broken links don’t just happen out of nowhere – there’s usually a reason behind them. Understanding the root causes will help you prevent them from popping up in the future.
1. Page Deletions
The most common culprit. You delete or move a page, but forget to update or remove the links pointing to it.
The result? A link that goes nowhere. This often happens when you reorganise your website or delete old content without checking if other pages link to it.
2. URL Changes
Changing URLs without setting up proper redirects can lead to broken links. If you move a page to a new URL (or update the URL for SEO purposes), and you don’t set up a 301 redirect, anyone who clicks on the old link will get a 404 error.
3. Server or Hosting Issues
Sometimes, the issue is on the server side. If your server is down or there are technical issues with your hosting provider, users might hit a dead link, even if the page exists.
4. External Links That No Longer Exist
External links (links pointing to other websites) can break when the linked site deletes their page, moves it, or blocks access. You have no control over these, but it’s still important to check for them regularly.
5. Typos or Incorrect Linking
It’s easy to make a typo when linking to another page or an external site. Even one extra space, a missing character, or a misformatted URL can break the link. Always double-check your links to avoid this!
6. Content Management System (CMS) or Plugin Failures
Sometimes, technical issues within your CMS or plugins can create broken links. For example, an update might overwrite certain links or cause broken redirects without your knowledge. Always keep your CMS and plugins up to date.
The Impact of Broken Links on Your Website
Broken links are not mere inconveniences; they can have a serious impact on your website’s performance. Here’s why you should care:
1. A Negative User Experience
Users hate dead ends. Imagine landing on a product page, only to click a link and hit a 404 error.
Frustrating, right?
A bad user experience means visitors are more likely to leave your site, and that could lead to a higher bounce rate. If your users can’t navigate your site smoothly, they’ll go elsewhere. Simple as that.
2. Rankings Drop
Search engines, like Google, don’t like broken links. They’re a signal that your site might be outdated or poorly maintained, which affects your credibility.
When search engines find a bunch of broken links, your rankings could drop. Worse yet, if a broken link leads to an important page (like a product or service page), you’re potentially losing valuable organic traffic.
3. Missed Conversion Opportunities
E-commerce websites rely heavily on conversions – whether it’s purchases, sign-ups, or other actions.
A broken link leading to a checkout page or a product could result in lost sales. If a user can’t access the information they need, they’re out the door (or off to a competitor’s site).
4. Link Juice Flow Disruption
Internal links help with SEO by passing “link juice” (ranking power) throughout your site. Broken internal links mean that link juice isn’t flowing where it should, and pages that should be ranking might not be.
This can make it harder for search engines to crawl your site and affect the overall performance of your content.
5. Loss of Trust and Credibility
Broken links make your site look unprofessional. If your visitors consistently hit 404 pages, they might start questioning your site’s reliability.
In today’s competitive online environment, trust is key. If your site looks outdated or poorly maintained, you risk losing customers, clients, and even potential partners.
Types of Broken Links You Need to Know About
Not all links are created equal. Understanding the different types of broken links on your site will help you prioritise which ones need fixing first.
1. Broken Internal Links
Internal links are the ones that connect different pages within your website. They’re the links that help users navigate your site and search engines crawl it.
Broken Jump Links
Jump links are internal links that point to a specific section on the same page, often used for navigation within longer blog posts or product pages. These links are helpful in providing a smooth user experience, especially when trying to jump to a certain part of the page quickly.
For instance, you might have a jump link to a product comparison table or an FAQ section. If that link breaks, users who try to skip to that part of the page get stuck. A broken jump link doesn’t take them where they expect to go, which results in frustration and a poor user experience.
Broken External Links
External links point to other websites, and while you don’t have control over them, they’re still a part of your site’s user experience.
Imagine you link to a news article or a reference page on a third-party website, but that page has been deleted or moved. Your visitors click the link, expecting to find valuable information, only to be met with a 404 error. This not only frustrates your users but can also give the impression that your site is outdated or unreliable.
Tools for Finding Broken Links
Screaming Frog SEO Spider is one of the most powerful and widely used tools for finding broken links. The free version is a great option for smaller websites or those just starting out with site audits.
It’s a desktop-based application that crawls your entire site, identifying broken links and offering detailed reports.
If your site grows or you need more features, the paid version is definitely worth considering.
Google Search Console (GSC) is a must-have for anyone serious about website performance. It gives you an overview of your website’s health, and it can help you spot broken links.
It has some limitations though:
i. It does not detect broken jump links (internal links that navigate to specific sections within the same page).
ii. It only reports errors that Googlebot encounters during crawling. If your site is not getting crawled regularly, you might miss some broken links.
iii. It doesn’t tell you the pages linking to the 404 error pages.
Ahrefs is known for its powerful SEO tools, but did you know they offer a free tool for finding broken links?
While the free version limits the number of reports, you can still run useful audits to find and fix broken links.
W3C Link Checker is a great option if you want a more technical, detailed report on broken links. This tool is perfect for developers or anyone who wants to dive deep into the structure of their website.
The interface is not as user-friendly as some of the other options and there is no option to export the data.
How We Find Broken Links on Entire Website
We use Screaming Frog SEO Spider. The paid version of this tool lets you crawl your entire website, find broken links, and generate detailed reports so you can quickly fix the issues. Let’s walk through the process step-by-step.
Step 1: Start a New Crawl
Open Screaming Frog and enter your website's URL in the search bar at the top. Hit "Start" to begin crawling your site. The tool will now scan all the pages it can find on your site.

Depending on the size of your website, the crawl might take a few minutes to an hour. While it’s working, you can see the progress in the interface.
Once the crawl is complete, you’ll see a full list of your website’s pages, along with their status codes, including 404 errors (which indicate broken links).
Step 2: Filter for Broken Links (404 Errors)
Once the crawl finishes, click on the “Overview” tab on the right-hand side.
Next, scroll down and click on “Internal Client Error (4xx)”. Do the same for External Client Error (4xx).
This will show you all pages on your site that returned a 404 error, meaning they are broken links.
Step 3: Export the Broken Links (URLs)
Now, you’ll see a list of all the broken links (404 errors). The important columns to focus on are the “URL” (the broken link) and “Linked From” (the page that links to the broken URL).
You can export this data to a CSV file by clicking on “Export” in the top menu. This allows you to easily track all the broken links and work on fixing them.
Step 4: Export Inlinks (Sources of the Broken Links)
To export the inlinks (sources of the broken links), click on the “Inlinks” tab at the bottom of the interface.
This will display a list of pages that contain the broken links (i.e., the “Linked From” column).
You can then export this data in the same way as the broken links, allowing you to track the source of each broken link.
Finding Broken Links on a Subfolder (For Specific Areas of Your Site)
If you want to find broken links within a specific area of your website (like a subfolder), Screaming Frog makes it super easy to crawl just that part of your site without scanning the entire site.
This is useful if you’re dealing with large websites and only need to check a certain section for broken links.
Start a New Crawl with Specific URL
Open Screaming Frog and enter the URL of the subfolder you want to scan. For example, if you want to scan a product section, enter the URL for that subfolder, like https://www.yoursite.com/products/.
Select “Subfolder” from the drop-down options next to the start button. To prevent Screaming Frog from crawling other sections, untick sitemap discovery and use the “Include” and “Exclude” functions to further narrow and restrict the crawl to the subfolder you want.
Hit “Start” to begin the crawl. Screaming Frog will now focus only on that specific subfolder and its internal links.
Let Screaming Frog complete the crawl. Depending on the size of the subfolder, this could take a few minutes. You’ll see a list of all pages within the subfolder that have been crawled, along with their status codes.
Finding Broken Links on a List of Pages (Bulk Search)
If you have a list of pages that you want to check for broken links, Screaming Frog offers an efficient way to bulk-check URLs without crawling the entire site.
This is perfect for when you have a specific set of pages (like high-priority landing pages, blog posts, or product pages) that you need to audit for broken links. Here’s how to do it.
Step 1: Prepare Your List of URLs
First, gather the list of URLs you want to check. This could be a list of blog posts, product pages, or any group of pages that are critical to your site. Make sure the list is in a simple text file or CSV format, with one URL per line.
Step 2: Import the List of URLs into Screaming Frog
Open Screaming Frog SEO Spider and click on the “Mode” option at the top and select “List”.
Now, click “Upload” in the top menu, then choose your file with the list of URLs you’ve prepared.
Screaming Frog will import the list, and instead of crawling the entire website, it will focus solely on the URLs you’ve provided.
How to Fix Broken Links
Finding a broken link is only half the battle. Once you’ve identified it, you need to take action to fix it before it negatively impacts your site’s SEO and user experience. Here’s what you should do next, depending on the situation.
1. Update the Link (If the Page Has Moved)
If the page you’re linking to has been moved to a new URL, the best solution is to update the link to the correct destination. This is especially common when URLs are restructured for SEO or content updates.
How to fix it:
- Find the new URL for the page (you may need to contact the website owner if it’s an external link).
- Go to the page where the broken link is located (the source) and update the hyperlink to the new destination.
2. Set Up a 301 Redirect (If the Page Is Permanently Gone)
If the page you’re linking to is permanently gone and there’s no relevant replacement, the best practice is to create a 301 redirect.
A 301 redirect tells search engines that the page has permanently moved to a new URL and will automatically send users to a related page.
How to fix it:
- Choose a relevant, active page that users can be redirected to.
- Set up the 301 redirect in your server or CMS (WordPress, for example, allows you to set up redirects through plugins like Redirection).
3. Remove the Link (If There's No Replacement)
Sometimes, there’s simply no relevant replacement for the broken link, and in this case, it’s best to remove it entirely. Leaving dead links on your site can confuse users and damage your site’s credibility.
How to fix it:
- Go to the page containing the broken link.
- Remove or replace the hyperlink with a different, relevant link or content.
- Ensure that the page still provides value to users after the link is removed.
4. Check for Additional Broken Links (Especially on High-Traffic Pages)
Once you’ve fixed one broken link, it’s a good idea to check if there are any more lurking on the same page or related pages.
High-traffic pages like your homepage, category pages, or popular blog posts are often linked to frequently, so checking these thoroughly is essential.
How to fix it:
- Run another scan with Screaming Frog to check for any other broken links on the same page.
- If multiple links are broken, repeat the steps above for each link.
5. Test the Fix
After you’ve updated, redirected, or removed the broken link, test it to make sure everything is working as expected.
Click through the updated link, test the redirects, and verify that no other issues are present.
How to fix it:
- Click on the updated link to ensure it’s taking users to the correct page.
- Use tools like Google Search Console to confirm that the 404 errors are no longer appearing.
Setting Up a Monitoring System to Prevent Future Broken Links
The best way to handle broken links is to prevent them from happening in the first place.
Setting up a monitoring system that regularly checks your website for broken links will save you time and effort down the road, ensuring that your site stays in tip-top shape.
Here’s how you can set up an efficient monitoring system to catch broken links before they become a problem.
1. Use Screaming Frog’s Scheduled Crawls
Screaming Frog SEO Spider’s paid version allows you to schedule regular crawls of your website. This means you can automate the process of checking for broken links, so you don’t have to manually run a crawl every time.
How to set it up:
- In Screaming Frog, go to “File” > “Schedule Crawl”.
- Choose the frequency of the crawl (e.g., weekly, monthly) and set the time.
- Select the settings you want for the crawl (e.g., checking for 404 errors).
- Screaming Frog will automatically crawl your website at the set intervals and notify you of any broken links.
2. Enable Google Search Console Notifications
Google Search Console (GSC) is another powerful tool to help monitor broken links.
While it doesn’t automatically check every page for broken links, it will notify you if Googlebot encounters any issues crawling your pages. This includes 404 errors, which indicate broken links.
How to set it up:
- Log in to Google Search Console and go to the “User Settings” from any page at the top right.
- Click “Email preferences” and ensure email notifications is ticked.
3. Regularly Audit Your Website’s Content
While automated tools are great, human oversight is also important.
Conduct regular content audits to ensure that your website’s structure is intact and that there aren’t any outdated links.
You can schedule quarterly or bi-annual content reviews to spot any issues that might have slipped through the cracks.
How to set it up:
- Create a calendar for regular content audits (every 3-6 months).
- During each audit, manually check for any outdated or broken links, and update or remove them as needed.
Don’t Have a Screaming Frog License? No Worries, We’ve Got You Covered
Not everyone has a Screaming Frog license, and that’s okay. We’re here to help.
If you don’t have access to this powerful tool, we offer a one-time service where we’ll crawl your site, identify all the broken links, and send you the data you need to fix them.
It’s quick, hassle-free, and ensures that your site stays in top shape without you having to do all the heavy lifting.
Just let us know, and we’ll take care of the rest.
Thank you for considering us for your technical SEO needs. We're excited to collaborate and achieve your goals.
Company
Services
Legal
Copyright 2025 Tech SEO Pros | All Rights Reserved